Wednesday, February 1, 2012

Elmo cut and paste project

I really should know better than to make goals. My brain is just not good at consistency these day. However, I do make and effort to come up with some project each day for my son to do. Thank you, Pinterest, for making this so easy.

This Elmo cut and paste project was pinned by FunWithMama.com, which looks like a site I will need to follow more closely! 

While D was sleeping, I printed out the Elmo page. He was very excited to find it on the table after nap time.

Since his scissors have packed in storage until we're in the new house, I cut out the pieces for him.

First, he followed the picture to make the face.

"How's this look, Mommy?"

He compared his work to the picture again.

Then used the glue to secure the pieces.

It was his first time using a glue stick.

The second time around, he figure out that the eyes had to be higher.

When we were done, he insisted that Elmo needed legs. Not arms, apparently, but legs. He also spelled out Elmo's name. I'm very proud of his writing.

Click here for your own printable.

Tuesday, January 31, 2012

Lemon Crinkle Cookies


I'm not nearly as creative or crafty as my previous posts may have indicated. I'm not generally posting pins as often as I am pinning. I do a lot of my menu planning and snack-finding ideas from Pinterest. I found this recipe on Pinterest a few weeks ago and made plans to make it, but then everyone got sick and I did not feel like doing any extra baking. Now that we are starting to all feel better, it's cookie day!


The recipe comes from LDS Living, which sponsored a cookie contest, and this little gem is the winner.

Lemon Crinkle Cookies 
from LDS Living
Makes 2-3 dozen

Ingredients: 
  • ½ cups butter, softened 
  • 1 cup granulated sugar 
  • ½ teaspoons vanilla extract 
  • 1 whole egg 
  • 1 teaspoon lemon zest 
  • 1 Tablespoon fresh lemon juice 
  • ¼ teaspoons salt 
  • ¼ teaspoons baking powder 
  • ⅛ teaspoons baking soda 
  • 1-½ cup all-purpose flour 
  • ½ cups powdered sugar 
Directions: 
  1. Preheat oven to 350 degrees.
  2. Cut a lemon in half. Squeeze juice into a small bowl. You should get about a Tablespoon. I used a little more. Zest the peel with a grater to until you have a teaspoon.
  3. Grease light colored baking sheets with non-stick cooking spray and set aside. (Or place your new Silmat in the baking sheet!)                        
  4. In a large bowl, cream butter and sugar together until light and fluffy. 
  5. Whip in vanilla, egg, lemon zest, and juice. Scrape sides and mix again. 
  6. Stir in all dry ingredients--excluding the powdered sugar--slowly until just combined. Scrape sides of bowl and mix again briefly.                      
  7. Pour powdered sugar onto a large plate.   
  8. Roll a heaping teaspoon of dough into a ball and roll in powdered sugar. Place on baking sheet and repeat with remaining dough.                       
  9. Bake for 9-11 minutes or until bottoms begin to barely brown and cookies look matte {not melty or shiny}.                                                 
  10. Remove from oven and cool cookies about 3 minutes before transferring to cooling rack.  
 *If using a non-stick darker baking tray, reduce baking time by about 2 minutes.


Monday, January 30, 2012

Personalized Kids Art Display


Several months ago, I was browsing TJ Maxx and I saw a kids art display that looked a lot like this.

I thought it was really cute, and I love the idea of having a flexible way to display our son's art projects. But...it wasn't really our style. I know the rustic/distressed/weathered look is popular right now, but it's just not us. So  I didn't buy it. I figured it would be easy enough to make some day...once we get into our new house and start collecting tools. 

Then, a few weeks ago, I saw this one:

Keep in mind, my son LOVES trains. I realized it was better than anything I could make myself, and the blue is a great match for his new room.

Best of all, the train had six cars (including the engine) and Daniel just happens to be six letters long. Easiest. project. ever. All I had to do was add the chip board letters I already had.

He LOVED it!

Today's post was pretty wimpy, heavy on luck and low on project. I think if you had a piece of sanded wood, it would still be pretty easy to make: a little paint, a little vinyl and screwing in the clips. 

If you want another option, check out what I Heart Organizing did with upcycled cabinet doors.

Click here for step by step directions. It's really cool!

Sunday, January 29, 2012

Magnetic Calendar

My three-year-old D has an early obsession with letters and numbers. I've often made little countdown calendars to events like Gramma's visit, or trips to see Opa and Oma, or moving out of our house.

It doesn't surprised me that he now asks me every morning to tell him the season, the month, the day and the date.  I had been eyeing this magnetic calendar from Melissa & Doug for awhile now, but hadn't bought it simply because we were selling our house and didn't need to add to our clutter.
Then, one day I was at one of my favorite craft stores, The Flower Factory, and saw this magnetic perpetual calendar for $5. 
It doesn't quite fit with our transitional/modern/toddler aesthetic, but I knew I could make it work. After I got home, I found a similar one online for, gulp, $80! Since then, I've found others for a more reasonable price at Pat Catan's and Michaels. Funny aside, when I bought this, the cashier said, he thought it was discounted because no one could figure out how to use it! 

After I brought it home, I realized that I didn't want to use magnets to cover up the numbers and words. Since I was working around a snowstorm and sleeping toddler, I looked around to see what I could do. I had a few old magnets on the frig, so I cut them into windows.

I needed to cover up the verbage from the magnets. I tried D's finger paint, but it was translucent. The only other thing I had on hand was glitter glue.

That did the trick.

I still had to do something with the right side to make it more kid-friendly. Plus, I wanted to incorporate the seasons.

Hello Modge Podge.

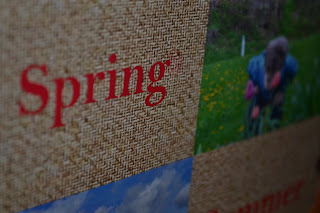
I made a quick seasons page in power point using four pictures of my son in the different seasons and using a background from the program. I printed it on photo paper.

It was still missing something, so I added the border using felt leaves I bought from the Target dollar bin years ago. I knew I'd find a use for them eventually.

I used a strip of scrapbook paper for the header because the photo was a little short. Then I used some chip board letters I had picked up at Hobby Lobby for another project to add "Seasons."


I made this very sad (temporary) arrow to indicate the season until I find something I like better. 

If I were more organized, I would have kept track of the cost of this project. But since, other than buying the magnetic calendar for $5, I used things I already had on hand, I'm going to say this cost me $5. And my son loves it!

Introduction

Hi! My name is Jen and I'm addicted to Pinterest.


I discovered Pinterest in the midst of building our family's dream house.  It's been a fabulous resource (along with Houzz.com) for ideas as we design, and later, decorate each room. I'm also Mommy to a cute three-year-old boy I'll call D. We use pinterest to find projects to do together. He likes browsing Pinterest as much as I do, and even asks me to pin ideas--usually anything to do with trains, planes or cars. Ever since D was born, I've been more committed to making healthy, from-scratch meals for my family. We have largely eliminated processed foods from our diets. Pinterest and Ziplist.com make meal planning a fun and easy weekly activity.

The top reason why I love and am addicted to Pinterest, however, is that I live with a brain injury, and have memory issues. Visual cues help me greatly, so Pinterest is a big therapy aid for me. I love being able to put all my thoughts in one place, and know that I can simply click a button and know that I can easily access my idea again later. In my pre-injury life, I was very organized as part of my personality. In my post-injury life, I need organization and routine to function well.

I've started this blog as a bit of a challenge to myself. A pin per day may be optimistic, but I wanted a place to write about the fun things I've found and pinned and completed. You might find a culinary creation, a toddler project, a house design inspiration, a DIY decor project, or maybe an organizing tip. Or, if I'm in bed nursing a headache, you might not find anything new. Some posts may be things I've made or done. Maybe it'll be something I'd like to do. Or perhaps, it'll be a pin I've uploaded from my own home.

For now, this will my own personal Pinterest diary, a bit of occupational therapy to record the things that don't fit into our other blogs, but hopefully I'll find some fellow pinners to join me.